Sunday, December 14, 2014

Front Yard Landscaping + Giveaway Day Winner

Happy Sunday everyone! We are enjoying a gorgeous weekend while awaiting another rainstorm here in Southern California tomorrow, and as this blogpost has a landscaping theme, here is a video of my new rainchain in action last week.  I absolutely love the twinkling sound it makes when water is flowing down through the cups.  If you want one yourself, go check out rainchains.com. 


I've been extremely busy on the weekends lately with landscaping in my front yard.  As I am participating in the City of Long Beach Lawn to Garden Program, I have a deadline of January 8th, 2015 to finish the entire process of ripping out my existing lawn to planting a new drought tolerant/California native garden. (They give you twelve weeks to get it all done.) Yesterday the planting stage began, which was very exciting.  

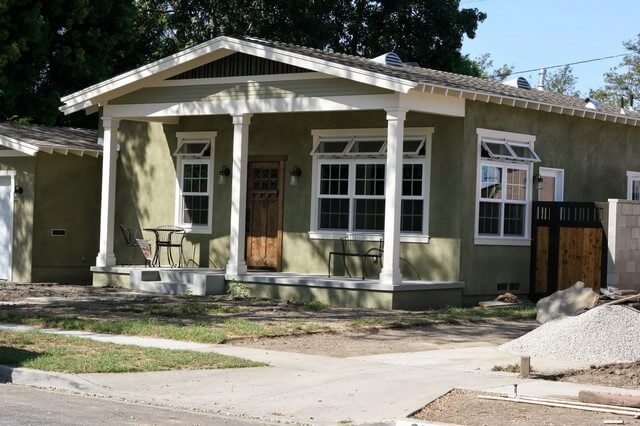
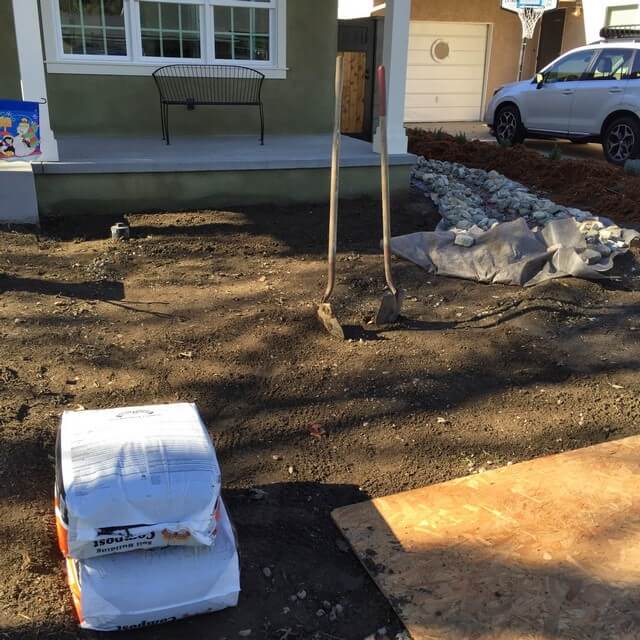
November 12, 2014, Veteran's Day. Front yard is a blank canvas. Entire front yard grass, including the parkway had been ripped out and about four inches of soil removed.  
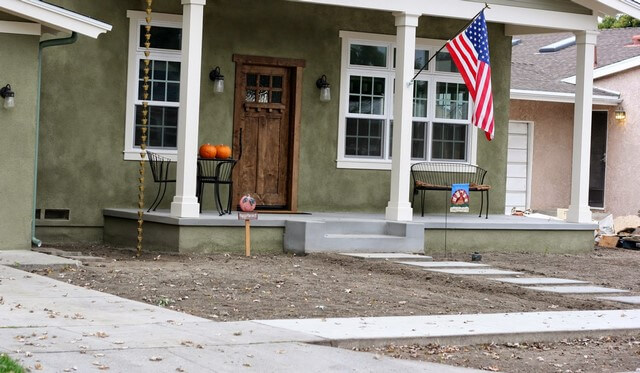
Can you see the rain chain just left of the porch? 
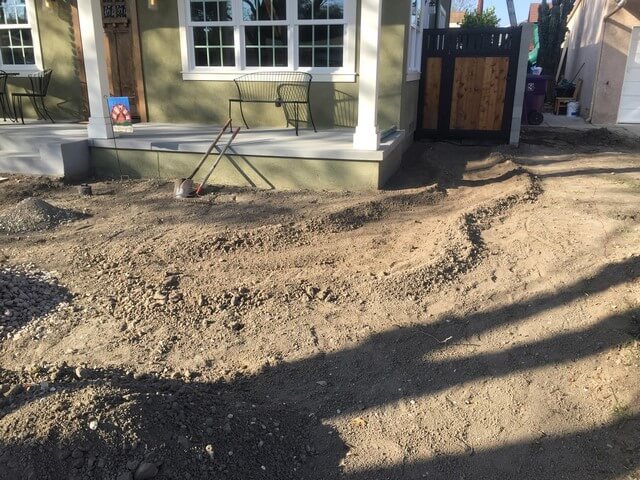
November 29, 2014. Rock has been delivered and work has begun on the dry riverbed that will start at my north side gate and meander toward an Olive tree that will be centered in front section of my yard. 

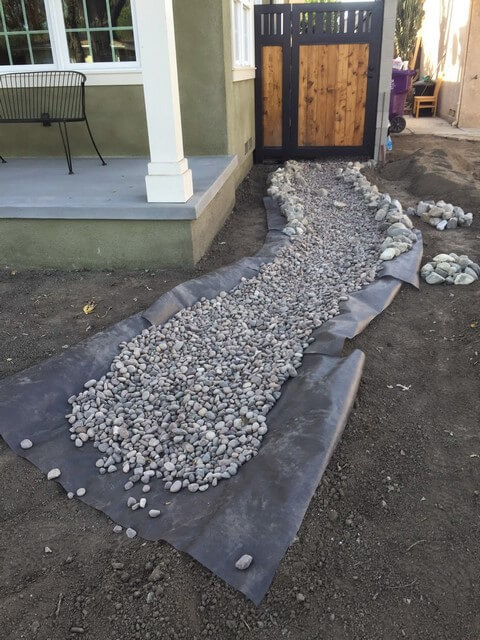
After laying down landscaping fabric, different sized rocks are being added to the dry riverbed. This is a work in progress as the goal is to make it look natural, not perfect. Various plants will go in along the edges of the dry riverbed.  

Between the garage and the porch is a dead area - with little sunlight the only thing this area grows is moss,etc., as all three roof lines bring water into this area when it rains.  It's an ugly spot now but will be  will be camouflaged once plants are added just in front of it.  

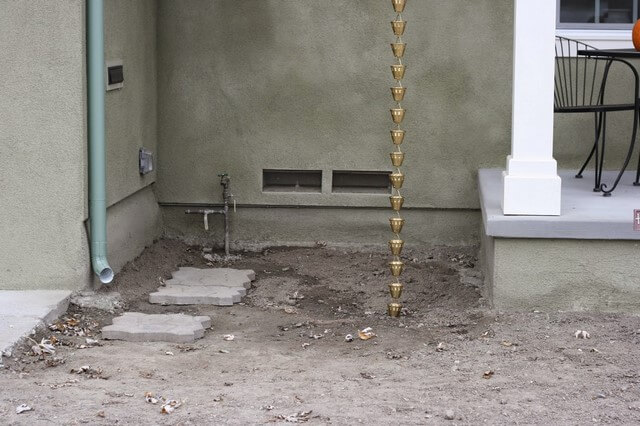
Because of downspout and rain chain, french drains needed to be dug in order to bring the water away from the house.  A ton of work but now it looks presentable with rock and a little fountain.  

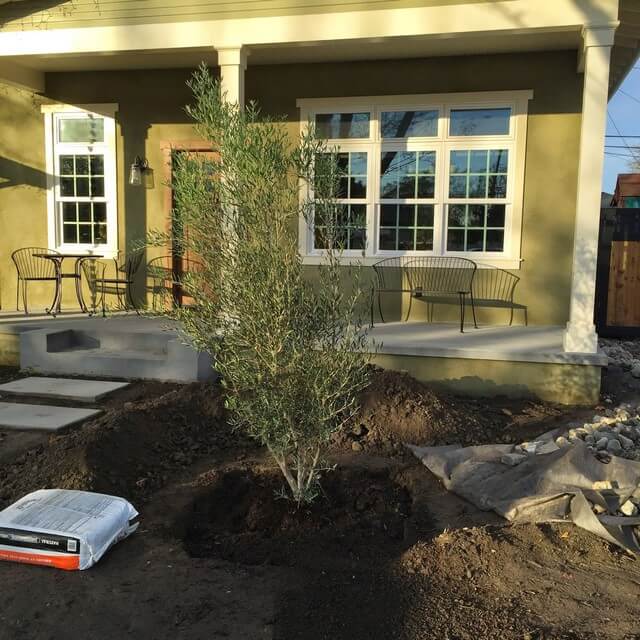
December 13, 2014. I've done more work to my dry riverbed and now it's time to plant the Olive tree.  Didn't expect to come home with an Olive tree after a visit to Village Nursery in Huntington Beach, CA yesterday, but it was the perfect tree.  

Have I told you yet how sick of dirt I am?  Especially when it's wet? 

After digging the largest hole ever (many jokes were made about who could be buried in that hole), the Olive tree went in.  
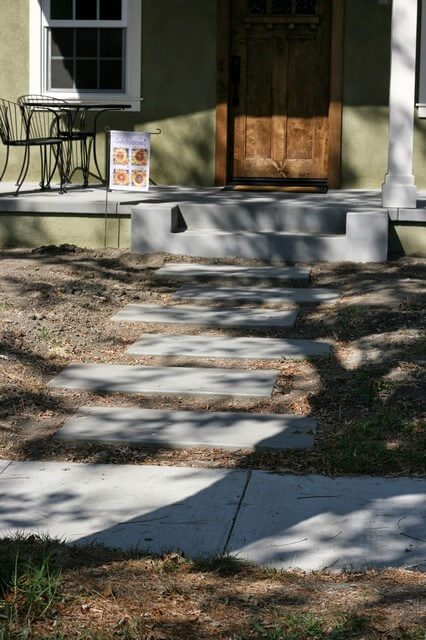
This is what it looks like right now. 
I love my new tree!
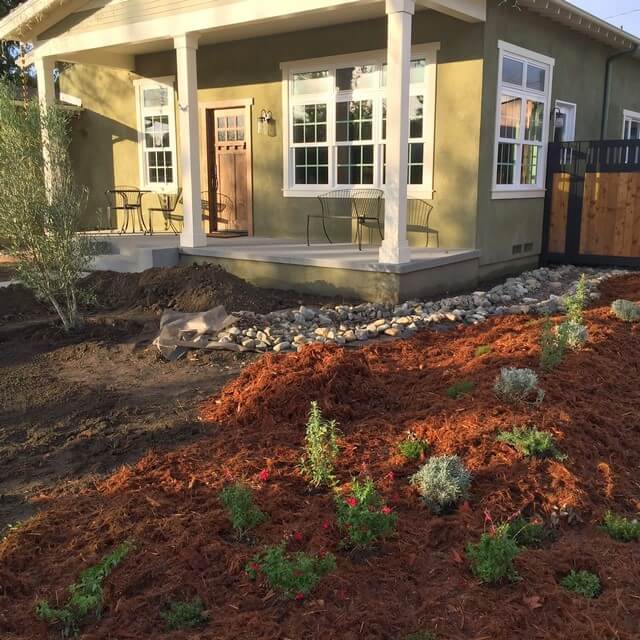
This photo is taken on my neighbor's driveway. They are also participating in the Lawn to Garden program and finished yesterday with the delivery of Gorilla Hair mulch (it doesn't stay red for long). Once I am done planting, I will use the same mulch.  


And now for my Giveaway Day Winner - I had the BEST comments this week from those who entered my Giveaway Day post on Monday.  I asked those who entered to tell me where they would go and why if they could travel into the past.  I'll be talking about the comments in my next podcast episode as those who entered had wonderful thoughts as to where they would go and why. 

I couldn't help but choose Barb N's comment for my winner this time.  Not an easy question for me to answer as a Historian, but this time of year has me thinking especially of my own mother.  Barb said: 

Oh, what an easy question! If I could project myself into the past, I think I'd like to be a fly on that wall and see my mother again. Watch her as a child growing up. And falling in love. Having babies. Decorating the Christmas tree. Maybe have her give me a hug again. Yep, easy question.

Congratulations to Barb! 

I'm off to dig in the dirt again, Happy Sunday to all, 
Susan 


Monday, December 8, 2014

SMS Giveaway Day ~ A Black and White Tote

I'm going to make this short and sweet ~ It's Giveaway Day at Sew Mama Sew.  

This year I've decided to participate by giving away a Black and White Noodlehead 241 Tote.   I made one for myself a few years ago and now this one is for you! 

Black and White Noodlehead 241 Tote made especially for Giveaway Day 2014.
Details: 
Win: Black and White Noodlehead 241 Tote (not the pattern).
How: Leave a comment answering this question, "If you could project yourself into the past, where would you go?"  (Please tell me why! Don't be surprised if I talk about your answer on my podcast, so make them good.) 
Giveaway closes: Friday, December 12, 2014 at 5pm  PST.
I'll announce the winner on a blogpost by Sunday, December 14, 2014 at 5pm  PST.

Lastly, as I am a historian and love globes and maps, I will ship internationally. 


Good luck and make sure to go enter more giveaways at Sew Mama Sew
Susan 

Tuesday, October 21, 2014

Fabric Tuesday: The Triton Quilt

Happy Tuesday!
Today's post is all about the evolution of the Triton Quilt I made for my son who is now a Freshman at University of California at San Diego (UCSD).  

Beginning Idea: Saturday, April 5th ~ Triton Day/Preview Day at UCSD. On drive to campus my son asked if I would make him a quilt and the design process began.  

As we walked around campus, I found my inspiration.

Process:  I used the Pictures to Pixels class by Caro Sherridan on Craftsy.com.  Although time consuming, the instructions were very clear.  I highly recommend this class if you wish to make a pixelated quilt.  


Once I finished finding all of the various Kona Color fabrics I needed, I began cutting on 9/3/14.
First stacks of fabric cut and ready.  Squares are 3" x 3".
Block 1 finished. 9/8/14
Blocks are 18" x 15".
Block 2 finished. 9/9/14
Six Blocks done.  9/10/14
9/19/14 ~ I thought I had all 16 done....
9/21/14 All 16 sewn together.  Success! 

9/22/14 Adding more Kona Snow to bring quilt top to 95" x 65".
9/24/14 Quilt backing done ~ hanging over kitchen island.  

9/24/14 Taping down quilt top to ready for basting. 

9/24/14 Batting
9/24/14 Quilt backing - Checkerboard squares of Kona Ocean and Corn Yellow,

9/24/14 Pinning the layers together.  OMG be careful not to scratch the floor with the pins! 
9/25/14 Start of the quilting process.  
Quilting took three days.  I did a straight line quilt pattern approximately 3.5 inches apart all throughout the Kona Snow using Aurifil #2024 White.  On the Triton design itself, I used Auriful #2740 Dark Cobalt, quilted in a stipple pattern meandering around from the bottom, and up and down all three tines.  
Binding:  I bound the quilt with a 2.5 inch strip in Kona Ocean and used Pat Sloan's Machine Binding tutorial.  Highly recommended! 

Ending:  Friday, September 29, 2014 at approximately 11:30pm.  Here is the quilt after it was washed and dried.  I was exhausted but exhilarated to be finished with this project.  Just in time! 
By the way at 10:00pm at night these two boxes, when inside a cabinet look extremely similar....What I thought were 6 (I was paranoid of bleeding) Color Catchers were actually Bounce sheets in the washer after the cycle was finished.  


9/30/14 7:00am A quick morning shot before the quilt is packed and driven to UCSD. 
The best part of the entire process was the text I received from my son after we had said goodbye and driven home. He sent me a picture of the quilt on his bed and a sweet thank you for all of my work.  
9/30/14 Approximately 3:00pm
I'm sharing the Triton Quilt on Fabric Tuesday at Quilt Story.  

If you want to hear more about the Triton Quilt, please listen to my latest podcast episode, The History Quilter Podcast Episode 42 Quilt Kits of the 1920's, 30's and 40's.  

Hope you are having a wonderful Tuesday! 
Ciao~
Susan 

Wednesday, October 15, 2014

History Quilter Podcast Episode 42 Quilt Kits of the 1920's, 30's and 40's


A new History Quilter Podcast Episode is now available on iTunes, Podbean and Stitcher Radio.  

Here is the quilt I made for my son who is now a Freshman at UCSD.  
The Triton Quilt - 95" x 65"

Links talked about in the episode: 

Modern Marvels: Quilts Made From Kits, 1915-1950 now showing at the International Quilt Study Center & Museum at University of Nebraska-Lincoln.  

International Quilt Study Center & Museum at University of Nebraska-Lincoln

Palette Builder 2.1 from Play Crafts.  This website is genius!  Upload your photo and within seconds Kona Color fabric colors are listed that match the colors in your photo.  Again, absolute genius! 


Pat Sloan's Machine Binding Tutorial from Pat Sloan.  This method creates a very attractive and strong blanket stitch to attach the second side of your binding.  Can't say enough about her tutorial - very helpful and easy to follow.  

Impossible to see with this photo - I'll get a better one when the Triton Quilt comes back at Thanksgiving. 

Go have a great day.  I know I will as I get to go teach!
Ciao~
Susan 

Wednesday, September 3, 2014

WIP Wednesday: A Pixelated Triton & Landscaping

Today was the start of the school year in the district that I teach in.  With no children attending school in this district anymore it seemed a bit strange but I enjoyed watching all of the neighborhood children setting off for High, Elementary and Middle Schools, in that order.  Of course I wished them all well especially in their History classes.  

First up on my WIP Wednesday List is the Triton Quilt.  This quilt is for my older son who start his Freshman year at UCSD on Saturday, September 27th and I am determined that he will have this quilt on his dorm bed that first evening.  I pixelated a photograph of the UCSD Triton logo and am using that photo as my guide for the squares ~ more on that as the quilt progresses.  
Triton Quilt in progress.  

Concurrently on my WIP Wednesday list is my front yard landscaping.  I've just submitted my landscape plan for the Long Beach Water Department Lawn to Garden Program.  The dead grass and dirt will soon be replaced with beautiful drought tolerant and (mostly) California native plants.  An Olive tree will be the focal point in front of the bench that I love to sit on with a dry riverbed meandering from the right side gate flowing into the Olive tree. 

my neighbors to the right are doing the same program  

ugly parkway will soon be beautiful
concrete steps will soon pop 


After the Triton Quilt is completed and in use at UCSD, I will continue with Roman Holiday (previously called Russian Rubix which I renamed this morning), I'm using a fabric line called Va Bene which has tomatoes, vespas and map of various landmarks of Rome.  


And lastly for today I have a little finish: I don't even have a name for this little cutie made of up Persian Stars made by members of the Modern Blocks Bee I participated in last year.  It's a mix of voile and onsaburg fabrics. 

Parisian Star Quilt
I'm linking up with Lee of Freshly Pieced for WIP Wednesday today - It is lovely to be back! 
Have a great Wednesday!
Ciao~
Susan 

Wednesday, August 6, 2014

A New Modern Quilt Guild & A Finish

Last night I had the great pleasure of attending the inaugural meeting of the Long Beach Modern Quilt Guild. A neighbor and fellow quilter told me about the meeting just a few days ago but I did not realize until we arrived at the Sew Vac store that it was the first meeting.  What fun and what luck! I have long wished to attend either the Los Angeles or Orange County Quilt Guild meetings, but at roughly 30 miles away in each direction, neither one was all that convenient. What a wonderful boost this new guild will be to our quilting world here in Long Beach.


Guild meeting fun: I won a little bag of organic batting that was donated from Birch Fabrics, the brick-n-mortar store of Fabricworm.com.  Also we were given a brown lunch bag for "homework" as we are to bring a completed modern style Mug Rug to the next meeting and a "brown bag swap" will occur with all finished Mug Rugs. Can't wait for next month!  **Note to Zina - you must join us! :)

Hot off the sewing machine:  This is a long term WIP and with Jaye's (Artquiltmaker.com) visit last month, she inspired me to get moving on it, among other things.  This is the Parisian Star from the Modern Blocks Bee I participated in 2013. The top is a mixture of Voile and Osnaburg (think a softer burlap) fabrics. I'll have more details once I quilt and bind it.

Photo bomb courtesy of younger son
It's been a wonderful quilty day!
Ciao~
Susan 

Monday, July 14, 2014

Wedding Cake Brooch

In late May I flew across the country to attend a wonderful family wedding in Annapolis, MD.  Now obviously the bride and groom (Ashley and Daniel - love them!) were the stars of the show but look at the wedding cake:
Simple and Stunning: 55 Brooches adorn this cake 
The cake was a perfect symbol of the entire wedding festivities: simple, stunning and full of love.  After the wedding my cousin (her son was the groom) told me a brief story about the pins/brooches which were attached to the cake and how she wanted to share them with special people.  She spent about 10 months collecting 73 brooches total (55 were on the cake and there were even some in the bride's bouquet!) and last week I was fortunate enough to receive one in the mail.  She enclosed a little note explaining how she picked this one for me because she thought it looked like a quilt pattern. Love it!  
Wedding Cake Brooch - mine was on the cake! 
Albert Weiss "Spinning Stars" 1954 
I had a little fun researching the history of Weiss Jewelry. My cousin shared with me that they were designed by Albert Weiss and his company was founded in New York City in 1942, flourished in the 50's and 60's and ceased operation in 1971. These pieces are called "costume jewelry" but I believe that is an understatement.  They are stunning and there is nothing "costumey" (if that's a word) about them.  I found the following Albert Weiss advertisements in Harper's Bazaar and Vogue from the 50's and 60's to illustrate just how hip this jewelry was in the those decades.  I love how the prices are listed on the advertisements.
Albert Weiss "Renaissance" 1954
Albert Weiss "Aurora Borealis" 1958 Harper's Bazaar


Albert Weiss "Big Pins" 1960 Vogue
It was a great honor to receive the brooch from my cousin and I will make sure to honor it with the memory of a truly special couple, Ashley and Daniel.
Now I need to figure out how I'll wear it!
Ciao~
Susan