Showing posts with label Recipes. Show all posts

Tuesday, April 17, 2012

T@tT: Chocolate Oatmeal Bars in Photos

Please don't think I only make desserts around here.  I know I've been showing you a great many lately but only because they are fairly easy, I always have my pantry stocked with baking goods and I don't buy cookies/cakes/etc.  Soon I'll be featuring meals I make for dinner again (The April edition of Bon Appetit has about 50 recipes that must be attempted in my kitchen.) but for today I'll share with you what I made last night; Chocolate Oatmeal Bars.

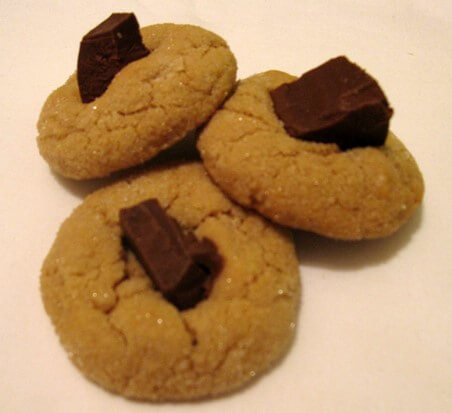
These have been around a long time with many variations in the name so attempting to credit the original recipe writer is proven (for me) to be rather impossible.  Here is my version of Chocolate Oatmeal Bars.
A batch of Oatmeal Chocolate Chip Dough

Melted: chocolate chips, sweetened condensed milk, butter and vanilla

Parchment Paper: One of my tricks in the kitchen

13 x 9 x 2 Pyrex Dish

Line Pyrex dish with Parchment Paper

Load in about two-thirds of Oatmeal Chocolate Chip Dough: press down

Pour over melted chocolate goodness and make sure you lick the spoon

Dollop remainder of dough over melted chocolate

Bake at 375 degrees for about 30 minutes

Let sit for about 30 minutes (if you can), then pull out of Pyrex pan

Enjoy!
Chocolate Oatmeal Bars
1 Batch of your favorite Oatmeal Cookie Dough (homemade or purchased) 
1 Bag  (12 oz) Chocolate Chips
1 14 oz can sweetened condensed milk
2 Tbl Butter
2 tsp Vanilla

1. Preheat oven to 350 degrees. In a double-boiler or saucepan melt the chocolate chips, condensed milk and butter.  Once melted remove from heat and add vanilla. 
2. Line a 13 x 9 x 2 Pyrex Dish with parchment paper. Take about two-thirds of the Oatmeal Cookie Dough and press into the bottom of your pan. 
3. Pour over all of melted chocolate mixture.
4. Dollop remaining Oatmeal Cookie Dough over the melted chocolate evenly. 
5. Bake about 30 minutes. Cool on a wire rack. Enjoy!

I'm linking up with Debbie at her Tuesday at the Table feature. This week she's got a sweet feature too which shouldn't be missed.  By the way I made her Quiche recipe from last week for a brunch I hosted on Sunday morning and it was absolutely delicious!


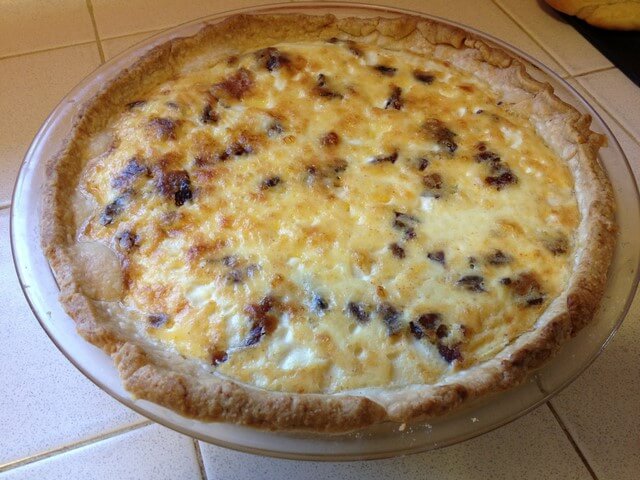
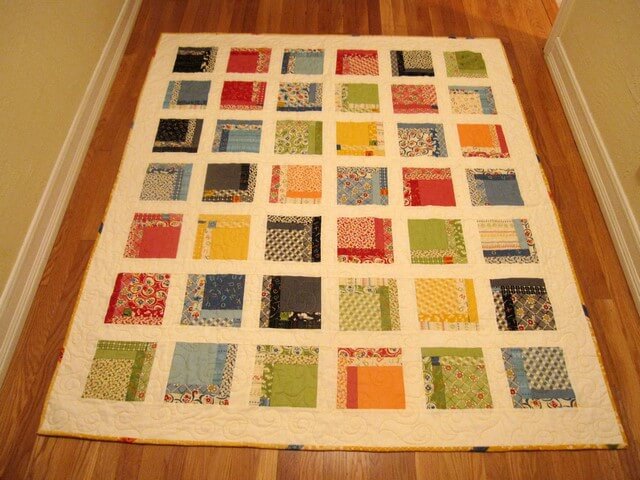
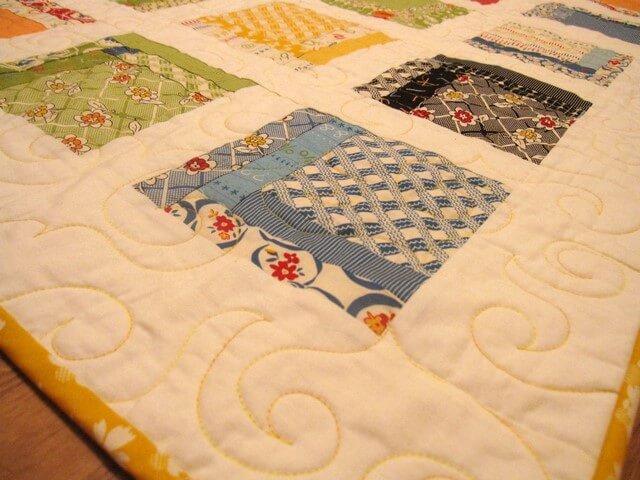
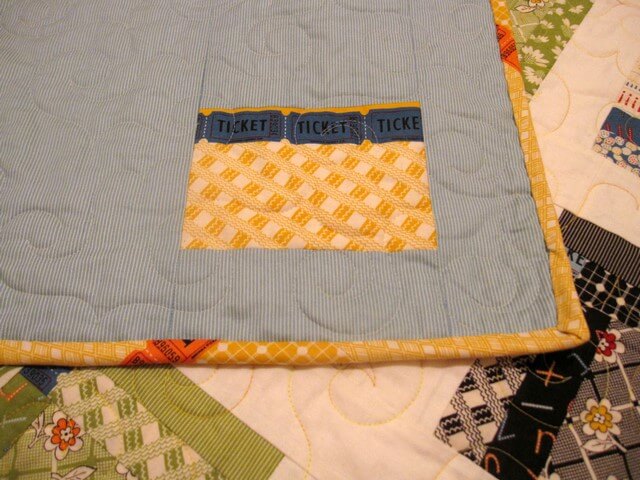
Quiche Recipe from Debbie at A Quilter's Table
Hope you all have a productive Tuesday,
Susan 

Tuesday, February 28, 2012

T@tT: PBCC Cookies & A Quilt Finish

I love to bake cookies.  Cookies, to me are instant gratification - Ingredients on hand, mix in a bowl, bake them up and enjoy.  The classic Tollhouse Chocolate Chip cookie recipe takes me about 20 minutes to go from ingredients in the pantry to a hot cookie on the counter.  I have vivid memories of my mother teaching me how to make them when I was so young that I had to stand on a stool to see over the counter.  I was such an active child (not unlike now) that I was always falling off that stool and boy would she scold me to "calm down".  I treasure those those memories.

Peanut Butter Chocolate Chip Cookies
Sunday night while watching the Academy Awards (in between commercials), my younger son and I made Peanut Butter Chocolate Chunk Cookies.  This is a Hershey Kiss recipe (go here for the recipe) which after the cookies comes out of the oven, an unwrapped Hershey Kiss is placed in the center while the cookie is still hot.  So fun to come back two minutes later or so and see how the bottom part of the chocolate has melted into the cookie but the top of the chocolate retains it's shape. As you can see from my photo those are not Hershey Kisses - I actually had two huge Hershey Kisses on hand so I chopped them up and placed big chunks into the cookies.  By the way, as my younger son is a male version of me, guess who is telling him to "calm down" in the kitchen?  Too funny.

Huge quilting news....Last night I finished a quilt!  I'll have all the details and better photos tomorrow but for now here is School Yard!

School Yard - 61" x 53"

My quilter did an amazing job. 
A label!  Now I just have to write on it.  
I'm linking up with Debbie at her Tuesday at the Table Feature...she posted about Hostess Cupcakes!  Silly me giving up sweets for Lent...I want one of her cupcakes NOW.  I'm also linking up with Fabric Tuesday at Quilt Story - go see what others have linked up to today.

Yea it's a school day for me!
Enjoy your Tuesday,
Susan

Tuesday, February 21, 2012

The Upward Turn & Cooking Salmon On The Stove Top

In 1969 Elisabeth Kubler-Ross published On Death and Dying where she introduced The Five Stages of Grief model explaining the five different stages that one goes through on their journey toward acceptance of a loss or change. These stages are not chronological nor are they a one way progression as one can vacillate from one stage to another, skipping some altogether.

As this is a history blog I felt like sharing with you where I am right now in my progression - see that graph above?  I'm definitely on the upward turn of that line which to me sounds so positive and hopeful - something that helps me in my transition to my new life without my father.  I've skipped a few of those emotions on that downward slide - maybe I'll slide back, maybe I won't but for now I am looking up.  

Onto the food!  

Yesterday afternoon I was inspired to try a new method of cooking salmon to help out a friend who was looking for a health way to cook fish on the stove top.  I love salmon and prefer it cooked on the BBQ with just a light covering of olive oil and kosher salt which leads to a crispy exterior and a creamy/buttery interior.  

As I began thinking about my meal, I thought how could I replicate the BBQ effect on the stove top?  I started with the pan - no cast iron or Calphalon for this project.  I went for my small nonstick pan as I wanted to eliminate all possibility of the fish sticking to the pan.  

Then I prepped by salmon just as I would for the BBQ - a light covering of olive oil with a sprinkle of kosher salt on the top.  

With the pan heated up to a level four (out of ten), I laid in one of the salmon steaks, skin side down.  The majority of the cooking is done with the skin side touching the heating element (pan, BBQ, etc.) as it is a natural protector to keep the fish from burning. 

Now it's time to wait patiently for the salmon to cook.  No turning, no fiddling, just waiting.  

With the photo above you can see that I've just added the salmon to the pan.   About five minutes later it looks like this.  See how the bottom layers of the salmon are turning a pale peach color and losing the translucent salmon color? 

When it looks like the cooking is halfway up the steak, the steak is very close to being done.  Now it's time to turn the steak in order to finish cooking the sides and top and to give it a little color/crunch.  
Pick a side and turn it.  It should sit right up without falling over as mine did.  Let it stay here for about a minute. The sizzling you will hear will result in the exterior crunch.  Then turn it over.  

 Wait another minute on the other side and then place it face down on the pan. At this point the salmon is done and only needs a few seconds face down to give it some color per your preference.  
This is where you need to help your salmon steak out a little - see how it doesn't sit flat?  A little yoga pose inspiration is needed here - Use your tongs for a little upward facing dog:
 
And a little downward facing dog:

I know, silly...but I'm in a good mood so I'm going with it. You end up with this...
I was very happy with the result as the salmon had that exterior crunch that I adore along with the creamy/buttery interior.  The salmon cooked for maybe eight minutes max- talk about a fast and healthy main part of a meal.  With some fresh sliced tomatoes, gently boiled potatoes and greek yogurt my meal was complete.  

Have a great day everyone~
Susan

Tuesday, February 14, 2012

T@tT: Comfort Foods - Spaghetti Bolognese

After a week of take-out, yogurt and peanut butter sandwiches, I went back into my kitchen yesterday afternoon and cooked for comfort. Cooked to soothe, cooked to remember and cooked to forget.  It helped.

I wanted pasta and I wanted it from Marcella Hazan.  She lives on a canal in Venice, Italy and cooks....lucky lady.  I could be very happy living on a canal in Venice, walking the local streets every morning to the market to buy food, greeting my neighbors in Italian along the way.  If you have a chance, listen this this NPR story about her from 2010 - here.
My boys and I on a canal in Venice, Italy 2006
Spaghetti bolognese is rather simple: a mirepoix of onion/carrot/celery, ground chuck, white wine, whole milk, a dash of nutmeg, tomatoes and S&P.  The process of gently cooking the mirepoix to the right temperature/ consistency and then waiting for both the milk and then wine to reduce down takes the longest in terms of hands on time.  Once you add the tomatoes, you stir and walk away.  Bolognese needs a long time to gently simmer on the stove and Marcella's recipe calls for three hours - I started early and let mine simmer for five. Go here for the recipe.


Everyone was happy to have a home cooked meal in front of them when I called them to the table and it pleased me to watch them dig in and go back for seconds.  The spaghetti bolognese was warm and comforting - just what I needed to soothe myself at the end of the day.

I'm linking up with Debbie's Tuesday at the Table feature - go see the cookies she has posted about today - they look fabulous!

Ciao~
Susan

Saturday, February 4, 2012

HQ Podcast Episode 21 Signature Quilts

This past Wednesday I recorded and uploaded History Quilter Podcast Episode 21 where I spoke about Signature Quilts.  The episode is now available on Podbean and iTunes. You can also listen directly from this website by clicking on the Podbean link to the right.

What is a Signature Quilt?  Signature quilts are quilts that have names inscribed on them either with pen or embroidery and are created with fundraising, fellowship and memory as their goal.  The International Quilt Study Center and Museum located at the University of Nebraska-Lincoln has a new exhibit called What's In A Name? Inscribed Quilts which I talked about almost exclusively in regards to Signature or Inscribed Quilts.  The link for the exhibit is here.

Have you ever participated in a Signature Quilt project? Do you have a Signature Quilt from the past?  Please comment below or send me an email if you have any experience with Signature Quilts.

In the three days between uploading the podcast and publishing this blogpost, I have already received one comment from listener Jane who sent me a link to a fascinating Quilting Board forum thread about the Signature Quilt top featured below.  The thread is called Paris Texas 1931 Friendship Quilt Top.  Go check out the link here to read how quilters/genealogists are attempting to help BrendaY, to identify whom the signatures belong to on the quilt top.

Paris Texas 1931 Friendship Quilt Top
Recipes:  Three-Cheese Lasagna With Italian Sausage
The 241 Tote by Anna Graham of Noodlehead that I made about a week ago:
241 Tote by Anna Graham of Noodlehead
Come back tomorrow for a little "before & after".

Have a wonderful Saturday wherever you are~
Susan