Friday, September 30, 2011

Tree Pants and Cream of Mushroom Soup

Quilting:
Toni had a great post this morning with various items which included a mention of the Sew Mama Sew {No Excuses} Holiday Sew-Along. There are three sew alongs one of which (Happy Zombie's Tree Pants) I decided to jump in on.  I have a nice selection of  Holiday Happy fabric which along with some coordinating solids will make my next Christmas Tree very happy.  Thanks Toni!


School:
The younger son came home yesterday with a letter from the principal asking parents to volunteer to move their child to another school.   Our school district, along with most across California and I will assume other states too, is strapped for cash.  So before school began earlier this month the school district basically told principals to over-enroll just in case students didn't show up the first day of school - they wanted as many students as possible to receive more money from the state.  This became a problem for schools once school began and all of the students showed up and now classes have 40, 42 and even 45 in a classroom with no chance for principals to hire more teachers.  Facebook was lit up last night with a whole slew of my friends weighing in on this.  Thankfully my youngest son is an 8th grader and the school he attends is our home school so there is no worry on him getting switched to another school, but I feel for the students whose parents wanted them to attend a better middle school outside of their area as they will probably get switched.  It's so sad.  
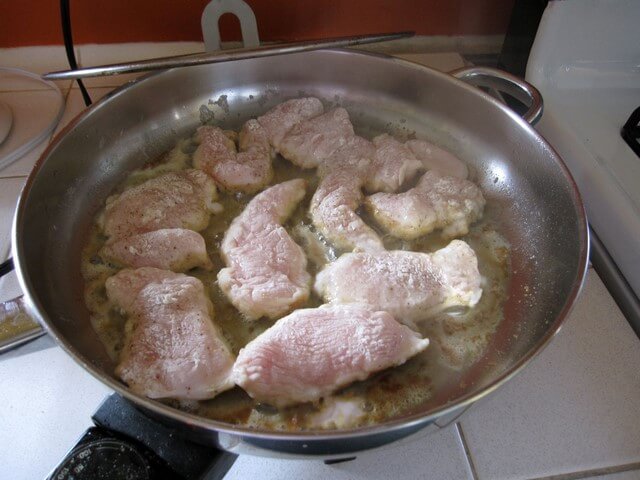
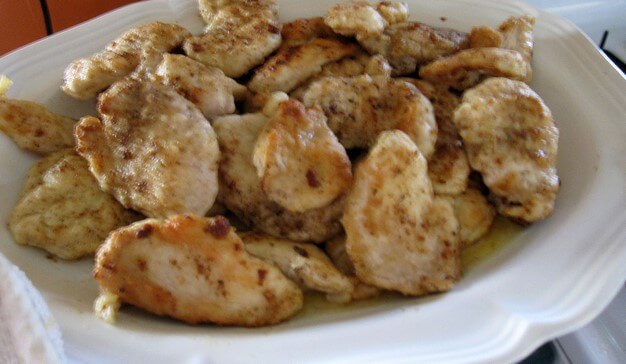
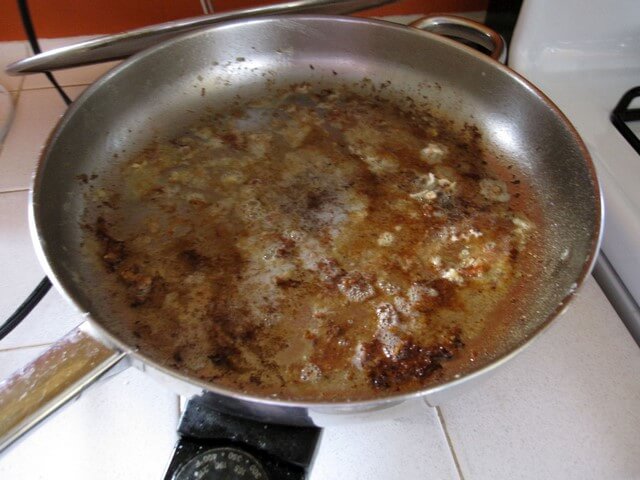
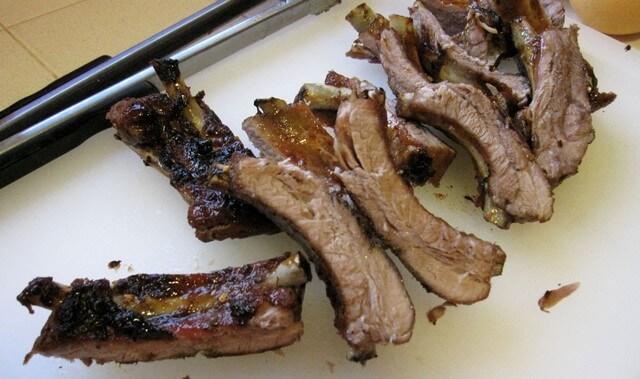
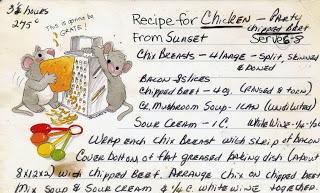

Cooking: 
Last night I made a dish for dinner that my mother made when I was growing up - one of my favorites.  I hardly cook with her recipes as they usually cause me to miss her but last night was different.  As I looked through her recipe box and combed through the 3 x 5 cards with her handwriting on all of them - some even typed, the thought that I needed to cook my way through her recipes became paramount.  After I got dinner in the oven I brought the recipe card with me to the computer and Googled the name....Chicken-Party Chipped Beef, thinking I would come up with nothing.  Oh was I surprised as everybody and their mother has a recipe for this which made me laugh and understand how widespread recipes which contain Cream of Mushroom soup really are.  And all along I thought this was some amazing family recipe....too bad I never noticed where it came from....Sunset Magazine!

Have a safe and enjoyable weekend,
Susan

Wednesday, September 28, 2011

Look Who I Had Breakfast With...

Mug Rug made by Zina for me - front
Isn't he lovely?  Oh but look on the back....
Mug Rug made by Zina for me - back
Had breakfast with him too.  All courtesy of Zina, my Goodie Swap 2011 partner who lives maybe a mile from me.  A mile!  Goodie Swap 2011 was an international swap (hosted by Cindy from Fluffy Sheep Quilting who lives in Ireland) with many gals from the UK participating so how funny is it that Zina and I somehow got paired together.

Not only did I receive the above mug rug but she also sent me the coolest bag...there was no photo I could take that would do it justice.  And she threw in a couple of fall colored fat quarters.
Please go visit Zina's Flickr page to see some of the other creative things she has made.   Thank you so much Zina for making my first swap so successful!  By the way I had seen this mug rug on the Flickr group and so when I saw who the package was from after I returned home from school last night about 9:30pm I squealed!  I knew right away that I was receiving one of her lovely fireman goodies.

A Work In Progress Update:

This is Supernova being based on the only solid surface in my house wide enough....just wide enough at 64 inches!  So glad I thought of doing this instead of the carpet as now that I am in the quilting stage, the back looks so much better.  I purchased the binding fabric and hope to get going on that by the weekend.

What's left on my WIP list:
Italian Sorbetto
Sliced Coins
School Yard

Lastly, it feels like Fall around here so I baked up a two loaves of Pumpkin Bread.


I'm linking up to WIP Wednesday #45 with Lee.  Please go visit her at Freshly Pieced to see what she and others are working on this week.  

Enjoy the rest of your Wednesday,
Susan

Saturday, September 24, 2011

UPS Delivery Excitement & Chicken Piccata

Online shopping is great for someone like me who doesn't really like to shop.  One of the things I like the most about it besides the fact that it is delivered to your door...is that you know when your items will be delivered to your door via UPS/Fed Ex tracking.  It's like stalking your package - I love it.  

About 6pm last night two packages that I was stalking across the country arrived via UPS....not fabric, but flour.....twenty five pounds of flour.  
The mug is mine...gives you a sense of how big the bag is.
Yes I ordered a twenty five pound bag of flour and a 32 ounce size bottle of Vanilla.  Obviously I bake a lot.  The vanilla I have purchased before and have room for...but the flour?  I'm going to have to get creative to find a spot for that huge bag.  

Amid my flour/vanilla delivery I was making Chicken Piccata for dinner for the family.  My favorite recipe comes from Cooks Illustrated which I have adapted here for you:
Chicken Piccata (adapted from Cook's Illustrated)
Serves 4
1/2 cup freshly squeezed lemon juice
3 or 4 skinless chicken breasts, rinsed, dried, sliced diagonally
3/4 cup of flour
5 tablespoons Olive Oil
2 cups Chicken Stock
3 or 4 tablespoons drained capers
4 or more tablespoons unsalted butter
fresh or dried parsley to sprinkle on 
1. Turn on oven to 200 degrees - this is for the chicken to remain warm while making the sauce.
2.  Sprinkle both sides of chicken slices with salt and pepper.
Chicken slices with S&P
3.  Dredge each chicken slice in flour and shake off excess.  
Chicken dredged in flour
4.  Heat up your electric skillet or use a 12 inch pan over medium high heat.  Melt about 2 tablespoons of butter and olive oil together. 
The olive oil helps keep the butter from burning

5.  Lay in the chicken slices and saute about 2 minutes on one side...you are looking for a nice browning on one side. The chicken kind of starts to pucker on the sides....use a spatula to look under one to see if it is browned.   
Nice sizzle going on in the pan
6.  While you wait for that two minutes on the first side...dash over to your sewing machine and finish putting the binding on a mug for for the Goodie Swap 2011.  Ok you don't really have to do this step.  :)
Mug rug for Partner #2 - hope it doesn't smell like chicken
7. When done on the first side, turn over and cook for only 1 minute.  Then remove from pan to an ovenproof plate to rest and keep warm in the oven.  
Cooked chicken ready for the oven
8. Look inside your pan....see all those brown bits sticking to the pan?  That's flavor - umami waiting for you to unlock with chicken stock and lemon juice.  
Umami - Japanese word for savory
9.  Add the chicken stock and lemon juice to the pan and use a wooden spoon(one of my favorite tools in my kitchen) to scrape the bottom to loosen the browned bits.  Let simmer for about 5 minutes.  Add in the capers.  Turn down the heat to low.
This probably smells really good
10.  Now it is time to thicken the sauce.  Add in about 2-3 tablespoons of butter and let melt into the sauce.  Now for the tricky part  - Use a small strainer with your left hand to dust flour into the sauce while whisking the sauce with your right hand.  Of course if you are left handed, please reverse.  I don't use a flour or cornstarch slurry as it seems to make the sauce to pasty...I just keep adding in the dusting of the flour until I get the exact consistency I want.  Sorry no photo...I only have two hands.  

10.  When the sauce is to your liking, add back in the chicken that was keeping warm in the oven and turn up the heat to bring the chicken up to the same temperate as the sauce.  

11.  I serve with lemon rice and a few lemon wedges and a sprinkle of parsley.  
Bon Appetit!
Enjoy your Saturday!
Susan

Wednesday, September 21, 2011

WIP Wednesday: Goodie Swap Mug Rug

Yesterday I posted photos of the two pouches I have made for my partners in the Goodie Swap 2011 and today I give you my first mug rug for Partner #1.  Partner #1 was generous enough to request anything the maker wanted so I decided to go with some of my beloved Anna Maria Horner fabric in both quilting cotton and voile.  Sure hope Partner #1 likes it.
Mug Rug for Partner #1
Next up is a mug rug for Partner #2 which I plan on working on tonight.  These little mini quilts are so fun to work on as they give me instant gratification.  In two hours I had this perfect little (almost) 8x8 mini quilt perfect for a cup of coffee or tea.  One of these days I need to make one for myself.

Other WIP's:
       Supernova hanging over my son's Papasan Chair.    I maps.  
 
Supernova ready to be basted
Backing fabric for Supernova
What's left:
Sliced Coins
School Yard
Italian Sorbetto

Lee is not hosting the WIP at Freshly Pieced this week as she is working on designing fabric for her Connecting Threads fabric collection.  How exciting is that?  Go by and give her some encouragement.  :)

Happy Wednesday!
Susan

Tuesday, September 20, 2011

Swap Intimidation

I am participating in the Goodie Swap 2011 hosted by Cindy from Fluffy Sheep Quilting and until two days ago I had not started on my projects.  I've had a whole month to figure out and work on these projects but I kept putting the process off, choosing to work on other things.  WHY?  I was intimidated by the thought that what I would be sending to my partners would not be good enough.  

A very motivating e-mail from Cindy last week knocked me out of my discomfort zone and got my creative juices flowing.  I used the Little Glam Bag pattern from Pink Sand Beach Designs that I used back in July to make myself a pouch.  After posting the photos on Flickr last night and receiving many positive comments from other swap members I learned a good lesson.  
What is my lesson?  Don't be intimated. What's the point?  

So here is what I have completed so far:  
Goodie for Partner #1

Goodie for Partner #2
So the goodies are done and now it's on to the mug rugs.  Will I coordinate the mug rugs with the pouches or not?  Not sure as I have seen others on Flickr (do visit the Goodie Swap 2011 Flickr group) do both.  

I'm linking up with Fabric Tuesday at Quiltstory - just noticed that there were quite a few Christmas themed items linked for this week....are we supposed to be thinking about Christmas already?  

Felice Martedi, 
Susan

Tuesday, September 13, 2011

When I Fell In Love With Ribs

I generally do not like to eat meat that is attached to bones and I have no idea why.  After two months in India back in my late teens, eating with my hands had become second nature to me so I think my aversion to eating foods with bones attached has more to do with what is on the bones.  I gravitate toward more of a seafood/pasta/vegetable kind of diet but will not say no to a really good hamburger (In-N-Out fits that bill) every now and then.  I eat a little bit of chicken....boneless chicken, thank you very much.

So after all that, how did I come to fall in love with ribs?  Ribs are bones and meat!  It's Sunset Magazine's fault.  Their August 2009 issue had an article about a "backyard ribfest" and I was so intrigued with the Spicy/Sweet ribs featured in the article that I had to give them a try.  Click on the link above and it will take you directly to the original article with three different ribs recipes.

The Grilled Baby Back Ribs with Sticky Brown Sugar Glaze featured in Sunset Magazine are the ribs that I fell in love with.  The whole family loves them and although the youngest member in the house is sporting a mouthful of braces, a fork substitutes just fine to tear the meat off the bones.  Follow along as I show you how I make Grilled Baby Back Ribs with Sticky Brown Sugar Glaze:

I start with a three rack package of ribs that I purchase at Costco:

Put on my plastic gloves, open the package, rinse off the blood and place the rib racks on a large cutting board:


Mix up Kosher Salt, Black Pepper and Cayenne Pepper and sprinkle over both sides of the racks:


Tear off two large pieces of aluminum foil (longer than your rib racks) and fold them together a few times width wise.  Then place one rack inside this large piece of foil: 

Fold together the foil lengthwise and roll up the ends until the rib rack is wrapped up snug.  Place the aluminum foil rib racks on the BBQ that is about 300-350 degrees over indirect heat:

Set the timer for 60 minutes and go do something fun: sew up another quilt block or research your latest podcast topic for example.  haha  Come back and open up the rib packs to find: 

Rib goodness...but they are not done yet.  I'm told the smell is to die for when the aluminum foil is ripped open...ahh my life with anosmia.  Grab your Brown Sugar/Cider Vinegar/Dry Mustard/Red Pepper Flake mixture and start rubbing the mixture on.  

After rubbing the first side, cook for 10 minutes, then turn.  Rub another coat of the mixture on, cook another 10 minutes and then turn one final time. They key to their doneness is the rib meat starts to pull away from the bones.  When you see that - they are done. Basically you will turn three times with a total cook time of 30 minutes after the ribs come out of the aluminum foil packet and then you have this:

Bring them in to your cutting board and slice away:

I love the mix of the spicy from the Cayenne Pepper in the rub and the Red Pepper flakes in the glaze combined with the sweetness of the brown sugar.  The basic steps in this recipe could be modified to any taste whether it be a BBQ sauce lover or a basic S&P kind of rib fan.  Cooking the ribs in the aluminum foil packet for an hour with only S&P and then using a BBQ sauce of choice, would equally translate into wonderful ribs.  

I serve these ribs up with homegrown sliced tomatoes, baked potatoes and focaccia. I've made these maybe ten times since I discovered them and still catch myself as I hold up a rib and tear into it with my teeth....and laugh.  One of these days I'm going to try beef ribs.  

Bon Appetit,
Susan

Thursday, September 8, 2011

A Historical Approach to an Appeteizer

Who: Me
What: Veggie Roll-Ups  ~ Adapted from The Summer Book by Susan Branch
When:  Today at about 10:00am PST
Where:  Supplies purchased at the grocery store, prep and execution done in my kitchen.
Why:  For a luncheon the husband attended.

Veggie Roll-Ups
How:   (For the original recipe go here to the blog of Susan Branch)

Veggie Roll-Ups
Makes about 40 pieces
1 Package of Flatout Flatbread (not easy to find but worth your time - use tortillas if you cannot)
1 package of Boursin Cheese 
1 bunch Watercress leaves or Radish sprouts - coarsely chopped
2 Carrots - grated
1 medium Red Onion - thinly sliced
1 Yellow or Red Bell Pepper - thinly sliced
salt and pepper
Toothpicks/Skewers

Begin by washing the vegetables and grating or slicing into the proper shape/size.  Have every ingredient in a separate bowl all prepared before starting to prepare the roll-ups.  Lay out the flatbread (the flatbread is oblong shaped so lay it horizontally) on a clean/dry surface and spread about two tablespoons of Boursin cheese over the surface of the flatbread.  Take a small handful of the grated carrot and sprinkle over the cheese, lay about five pieces of bell pepper lengthwise over the carrot and sprinkle about two tablespoons of the greens over the bell pepper.  Then take some red onion and lay over the bell pepper and sprinkle with S&P.  
Now it is time to roll it up.  
Starting at the bottom, begin to roll up the flatbread, lengthwise.  As you roll it up, make sure you gather into the flatbread any vegetable pieces that try to get away. Gently squish the roll as you go but not too hard as you don't want any of the vegetables to break out of the flatbread.  
With a clean, very sharp knife, cut up the flatbread roll into five or six pieces.  You will not be serving the ends so go ahead and cut them off - I usually end of eating them as they are too good to throw out.  
Use a toothpick or skewer to secure the Veggie Roll-Ups together.  Depending upon the holiday or season, using festive toothpicks can be a fun way to dress up this appetizer.  

Hope you enjoyed my historical approach to an appetizer.  Let me know if you make them! 

Are you ready for football season?
Ciao~
Susan

Monday, September 5, 2011

T-Minus Forty Eight Hours plus A Supernova Finish

It's just the top but it is now finished:

Supernova 
Can you hear me cheering?  I am so happy to finish this quilt top.

What's the "T-minus" mean in my title?  Approximately forty eight hours and 10 minutes from now my boys go back to school.  I was doing so well....held it together for 12 weeks but last Thursday when someone reminded me it was only six days I began to become unglued.  Not really...but I can't wait to have my alone time back.


Linking up to Megan at Canoe Ridge Creations for {Sew} Modern Monday #33 - go check what others are doing today.  


Happy Labor Day,
Susan

Sunday, September 4, 2011

Supernova Is Now Vertical

I came down with a cold this past Thursday evening which although irritating has not kept me from being productive with the sewing machine or in the kitchen.  In fact when I get sick I always seem to want to bake...maybe the comforts and warmth of the kitchen help to heal me in some strange way.  More on the baking below.

Friday morning I sewed the nine Supernova blocks together and then began working on the borders.  I sewed up one side of the borders and then realized that the spacing was off with where the coordinating print lines up with the Supernova blocks.  By Friday afternoon the kitchen needed attention so the borders were put on hold and Pumpkin Bread was made.

I have a love affair with (almost) all things pumpkin:  Pumpkin Bread, Pumpkin Ice Cream, Pumpkin Cheesecake, Godiva Pumpkin Truffles, etc., but I do not like Pumpkin Pie.  Mmmmm Pie...but not Pumpkin Pie.  The downside of baking with pumpkin is that there are months out of the year when cans of pumpkin are impossible to find in the store.  Pumpkin is a relatively easy crop to grow...if you live in Southern California -  where I've grown one of these in my backyard for years:
My oldest at 3...sitting on an 80 pound pumpkin.
One downside of this love of pumpkin is that the pumpkin crop can be subject to regional difficulties such as drought, flooding and pests.  Sometimes there are months out of the year when cans of pumpkin are very hard to find in grocery stores and for a few months now I've had to get my fix for Pumpkin Bread at Starbucks as my pantry has been empty.  Last week though I got lucky and found canned pumpkin on my local grocery store, bought the six cans on the shelf and then was teased for being a pumpkin hoarder.  Gotta have my pumpkin.  

My go-to Pumpkin Bread recipe comes from The Foster's Market Cookbook, a cookbook in which I have yet to find a bad recipe.  Please go here for a link to the recipe.  The recipe makes two 9 by 5 inch loaves, one of which is practically gone within hours and the other I slice, place in sandwich bags and freeze to enjoy whenever I want.


Pumpkin Bread in my freezer door
Do you have a favorite quick bread recipe that you freeze and enjoy at a later date? Share it with me and I'll talk about it on my next podcast.

Enjoy your Sunday,
Susan